
Advent Bunting Crafty Make
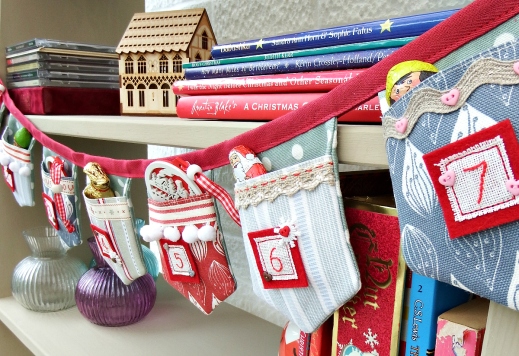
Advent Calendar Bunting
This month we are thrilled with the Crafty Make Ali from Very Berry Handmade has created. It’s a real piece to treasure, and hang up year after year at Christmas. The pockets are a great idea; each year as your child grows up you can theme the treats accordingly. That said we know quite a few grown ups who would like one of these too!
Our organic cotton fat quarters The Works are perfect for this project as you will get just enough to mix and match our designs and colourways.
So go on, have a go at creating your own and please do share the results with us on our Facebook page.

The lovely colours of these gorgeous organic cotton fabrics from Ochre and Ocre are perfect for this Scandi-influenced Advent bunting.
You will need:
0.5m fabric for bunting backs (I used the organic cotton in Madelaine Sage – the polka dot fabric)
0.5m (total) for pockets (I used 4 different fabrics to make up my 0.5m)
4m of 30mm bunting tape, or you can use bias binding
A selection of Christmassy trims, buttons, ribbons & bobble tape
20cm by 30cm roll of wool felt
Fabric suitable to stitch or print your numbers – I used 1 25cm by 35cm sheet of Zweigart Cashel 28 count linen to stitch on
A glue pen (I use one made by Sewline, but an ordinary glue stick will be fine) is invaluable for this project.
A4 sheet of stiff card to make pattern templates
I got the trims, snowflake and heart buttons, wool felt and 28 count linen used for the project from Cloud Craft – you could also get your embroidery thread (if using) from there too.
Pattern notes:
The seam allowance is 1cm throughout.
Cutting out
On your piece of card, draw a rectangle 11cm by 22cm. Mark the centre point of one of the 11cm sides and mark 3cm along on the 2 adjacent sides. Connect the lines on the sides with the centre dot and trim off the corners. Repeat at the other end of the rectangle to create template A. See Photo 1 to see what a piece of fabric cut with this template should look like.

Cut 24 pockets using template A. When you are cutting these pieces make sure that the long edges of the template are parallel with the selvedge so that the pattern runs in the right direction.
Draw another rectangle 11cm by 14cm. Mark a point in the centre of one of the 11cm sides and mark 3cm along on the 2 adjacent sides. Connect the lines on the sides with the centre dot and trim off the corners. This is template B. See Photo 2 to see what a piece cut with this template should look like.

Cut 48 bunting backs using template B.
Making the Pockets
Fold the 24 pieces made with template A in half across the middle so that the points match. Press then top stitch the fold on each piece. Photo 3 shows how the pockets should look.

Decorate the top edge of bunting pocket however you like. I cut six 11cm pieces of four different trims and machine stitched them to the top folded edge. I also added extra buttons and a bobble trim here and there. A glue pen is a really useful tool here for keeping trims and bobbles in place.
Make the numbers
The pieces of white linen I have used are 2.5cm square, and the pieces of wool felt they are mounted on are 3cm square – you can vary this as you like.
You can make the numbers however you like – there are lots of options. You can stencil them with fabric paint, draw them with a pen suitable for use on fabric, cut them out of fabric and applique them using Bondaweb, or stitch them, as I have done.
If you decide to embroider them, the easiest way is to draw a grid of squares (say 6 rows of 4) on some suitable fabric for embroidery, making the squares a little bigger than 2.5cm, use an erasable pen to mark the numbers, then stitch them, then cut them out. Because I used 28 count linen, I could trace my numbers from a print out I had made using word processing software.
Adding the numbers to the pockets
After you have cut your felt and numbers out, use a glue pen or a pin to hold the stitched number centrally on the piece of felt then position and glue or pin the piece of felt on the completed pocket. Machine stitch round the edge of the white fabric to hold both the felt and embroidery in place. I used a contrast red thread. You can now add more buttons, beads and more – whatever takes your fancy. I pulled out a few threads from the linen to give it a frayed effect.

Completing the bunting pockets
Place a bunting back section, right side facing, on your work surface, and put a pocket piece, again right side facing, on top, aligning the points of the pocket and bunting back. I use a little glue in the seam allowance to hold the pocket in place. See Photo 5 for how this should look.

Now add a second bunting back, wrong side facing, and right sides together with the other fabric pieces, on top. Pin in place. See Photo 6:

Stitch round the edge of the bunting pocket, leaving the short straight edge open. Remember to reverse stitch at either end of the stitching to hold it secure. Trim the seams to about 5mm and cut diagonally across the angles to reduce bulk (don’t cut through your stitching!). Photo 7 shows how a pocket should look when it is done.

Turn the pockets right side out, then press thoroughly to create a neat finish. If you have used any plastic buttons or beads, do take care as you iron.
Assembling the bunting
Fold the bunting tape in half lengthways and press. Measure 45cm along the tape and sandwich the unstitched edge of the first bunting piece between the fold at this point. Pin in place, then measure 2.5cm, and place the next pocket. Photo 8 shows what you’re aiming at.

Continue until all the pockets are in place. Measure another 45cm after the last pocket and trim the excess tape.
Stitch along the bunting tape, about 2-3mm away from the edge, to hold it closed and to stitch the bunting pockets into place. Make sure you are catching the back of the tape as you stitch.
Once the bunting pockets are in place, you can turn in the two raw short edges of the bunting tape, if you like, but it’s not essential.
And that’s your bunting all done and ready to hang. Hope it brings some extra Christmassy loveliness to your home!


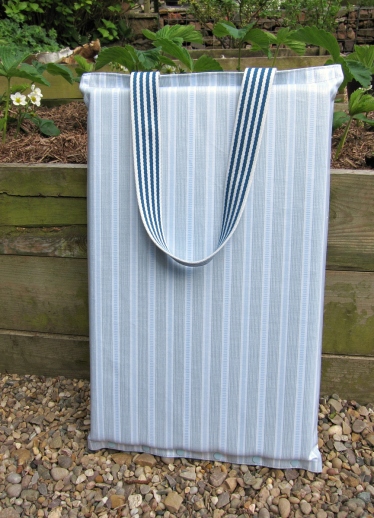
Quick patchwork Laundry Bag

Another fab tutorial for you this month from Ali Burdon of Very Berry Handmade
This colourful, practical, patchwork bag is really quick and simple to sew, and would be great for general storage, as well as for laundry. Ochre & Ocre organic fabrics are ideal for this project because they are hardwearing, wash well and look so very stylish.

Pattern notes:
I used a heavyweight cotton lining for the bag, if you are using lighter weight cotton then you might like to interface the lining with some medium weight iron on interfacing. Don’t be tempted to use upholstery weight cotton for the lining, this will make the bag very bulky and the drawstrings won’t pull tight.
The drawstring cord is made with 6mm cotton cord which is widely available online I bought mine from an Ebay seller.
The seam allowance is 1cm throughout. Press all seams open.
The finished size 50cm x 60cm
You will need:
A selection of scraps of various Ochre & Ocre organic fabrics measuring between 14cm and 22cm wide, about 1/2m in total. A cost effective way to do this is to buy a selection of the Ochre and Ocre organic fat quarters 38cm by 52cm of fabric A (I used the Ledbury design in Ochre Grey the yellow & grey fabric) for the top section of the bag.
8cm by 52cm of fabric B (I used the Isabella design in the red ) for the drawstring channel contrast section
3/4m of heavyweight cotton fabric C (light canvas or drill cotton is ideal)
130cm 6mm cord
Cutting list:
From fabric A cut:
2 pieces measuring 5cm by 52cm
2 pieces measuring 14cm by 52cm
From fabric B cut 2 pieces measuring 4cm by 52cm
From fabric C cut 2 pieces measuring 52cm by 62cm
Cut the drawstring into 2 equal pieces measuring 65cm.
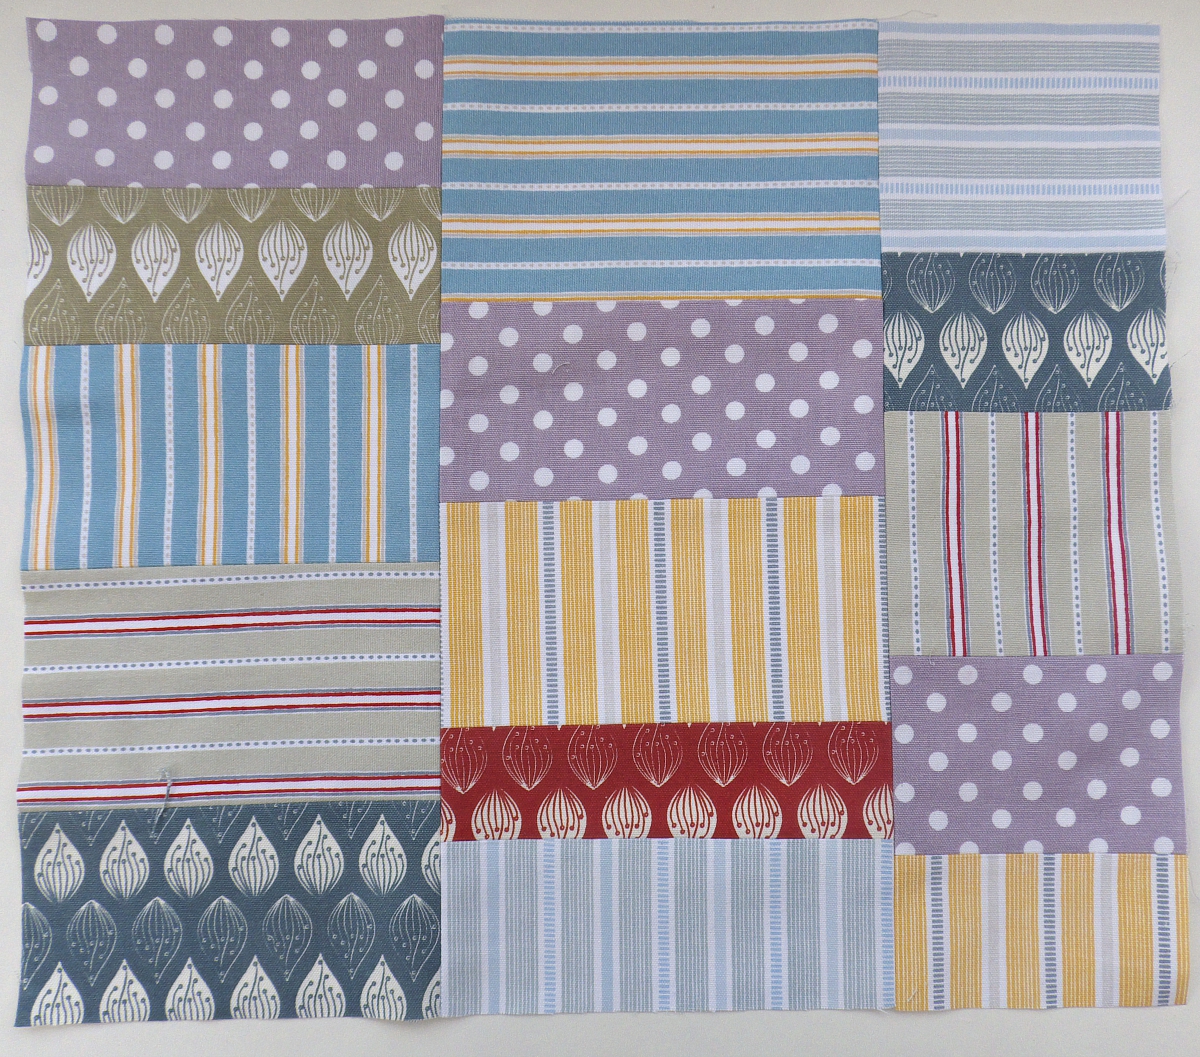
Step 1 Create the Patchwork panels
Use the patchwork pieces to create 1 column measuring 14cm by 45cm, one column measuring 20cm by 45cm, and one column measuring 22cm by 45cm. Press all the seams open. (Pic 1)

Creating the 3 columns
Stitch these columns together to create a panel measuring 45cm by 52cm. Press as before. (Pic
2)
Stitch the columns together
Repeat step 1 for the other side of the bag.
Step 2 Finish the front and back of the bag
Stitch one of the larger pieces of fabric A to the top of the front panel. (Pic 3).

Adding the large piece to the top of the panels
Stitch one of the pieces of fabric B to the piece of fabric A. (Pic 4)

Attaching one of the smaller piece B to the panels
Complete the front by stitching the smaller piece of fabric A to the top of fabric B (Pic 5).

Adding piece A onto the top of piece B
Trim all the longer seams to about 5mm.
Repeat step 2 for the back of the bag.
Step 3 Complete the outer section
Put the 2 outer bag pieces right sides together and stitch along one side seam, stopping and reverse stitching when you reach the narrow piece of fabric B Start stitching again (reverse
stitching at the beginning of the seam) on the other side of fabric B and complete stitching the side seam. The photo shows where to stop and start your stitching. (Pic 6)

Press the seam open and then, working on the right side of the bag, stitch a small rectangle around the hole you left in the seam. (Pic 7)

Stitch a small rectangle around the hole in the seam
Repeat this with the other side seam, leaving a small gap in the seam, and stitching round it as before.
Finally, stitch the bottom seam of the outer, then trim the seams, turn right side out, and press.
Step 4 Make the lining
Put the 2 lining pieces right sides together and sew round the 2 sides and the bottom. Leave a turning gap of 15cm in one of the side seams. Trim the seams as before.
Step 5 Finish the bag
Put the outside section into the lining, right sides together, and pin the outer and lining together all round the top edge, matching side seams. Stitch, trim the seam, then turn right side out.
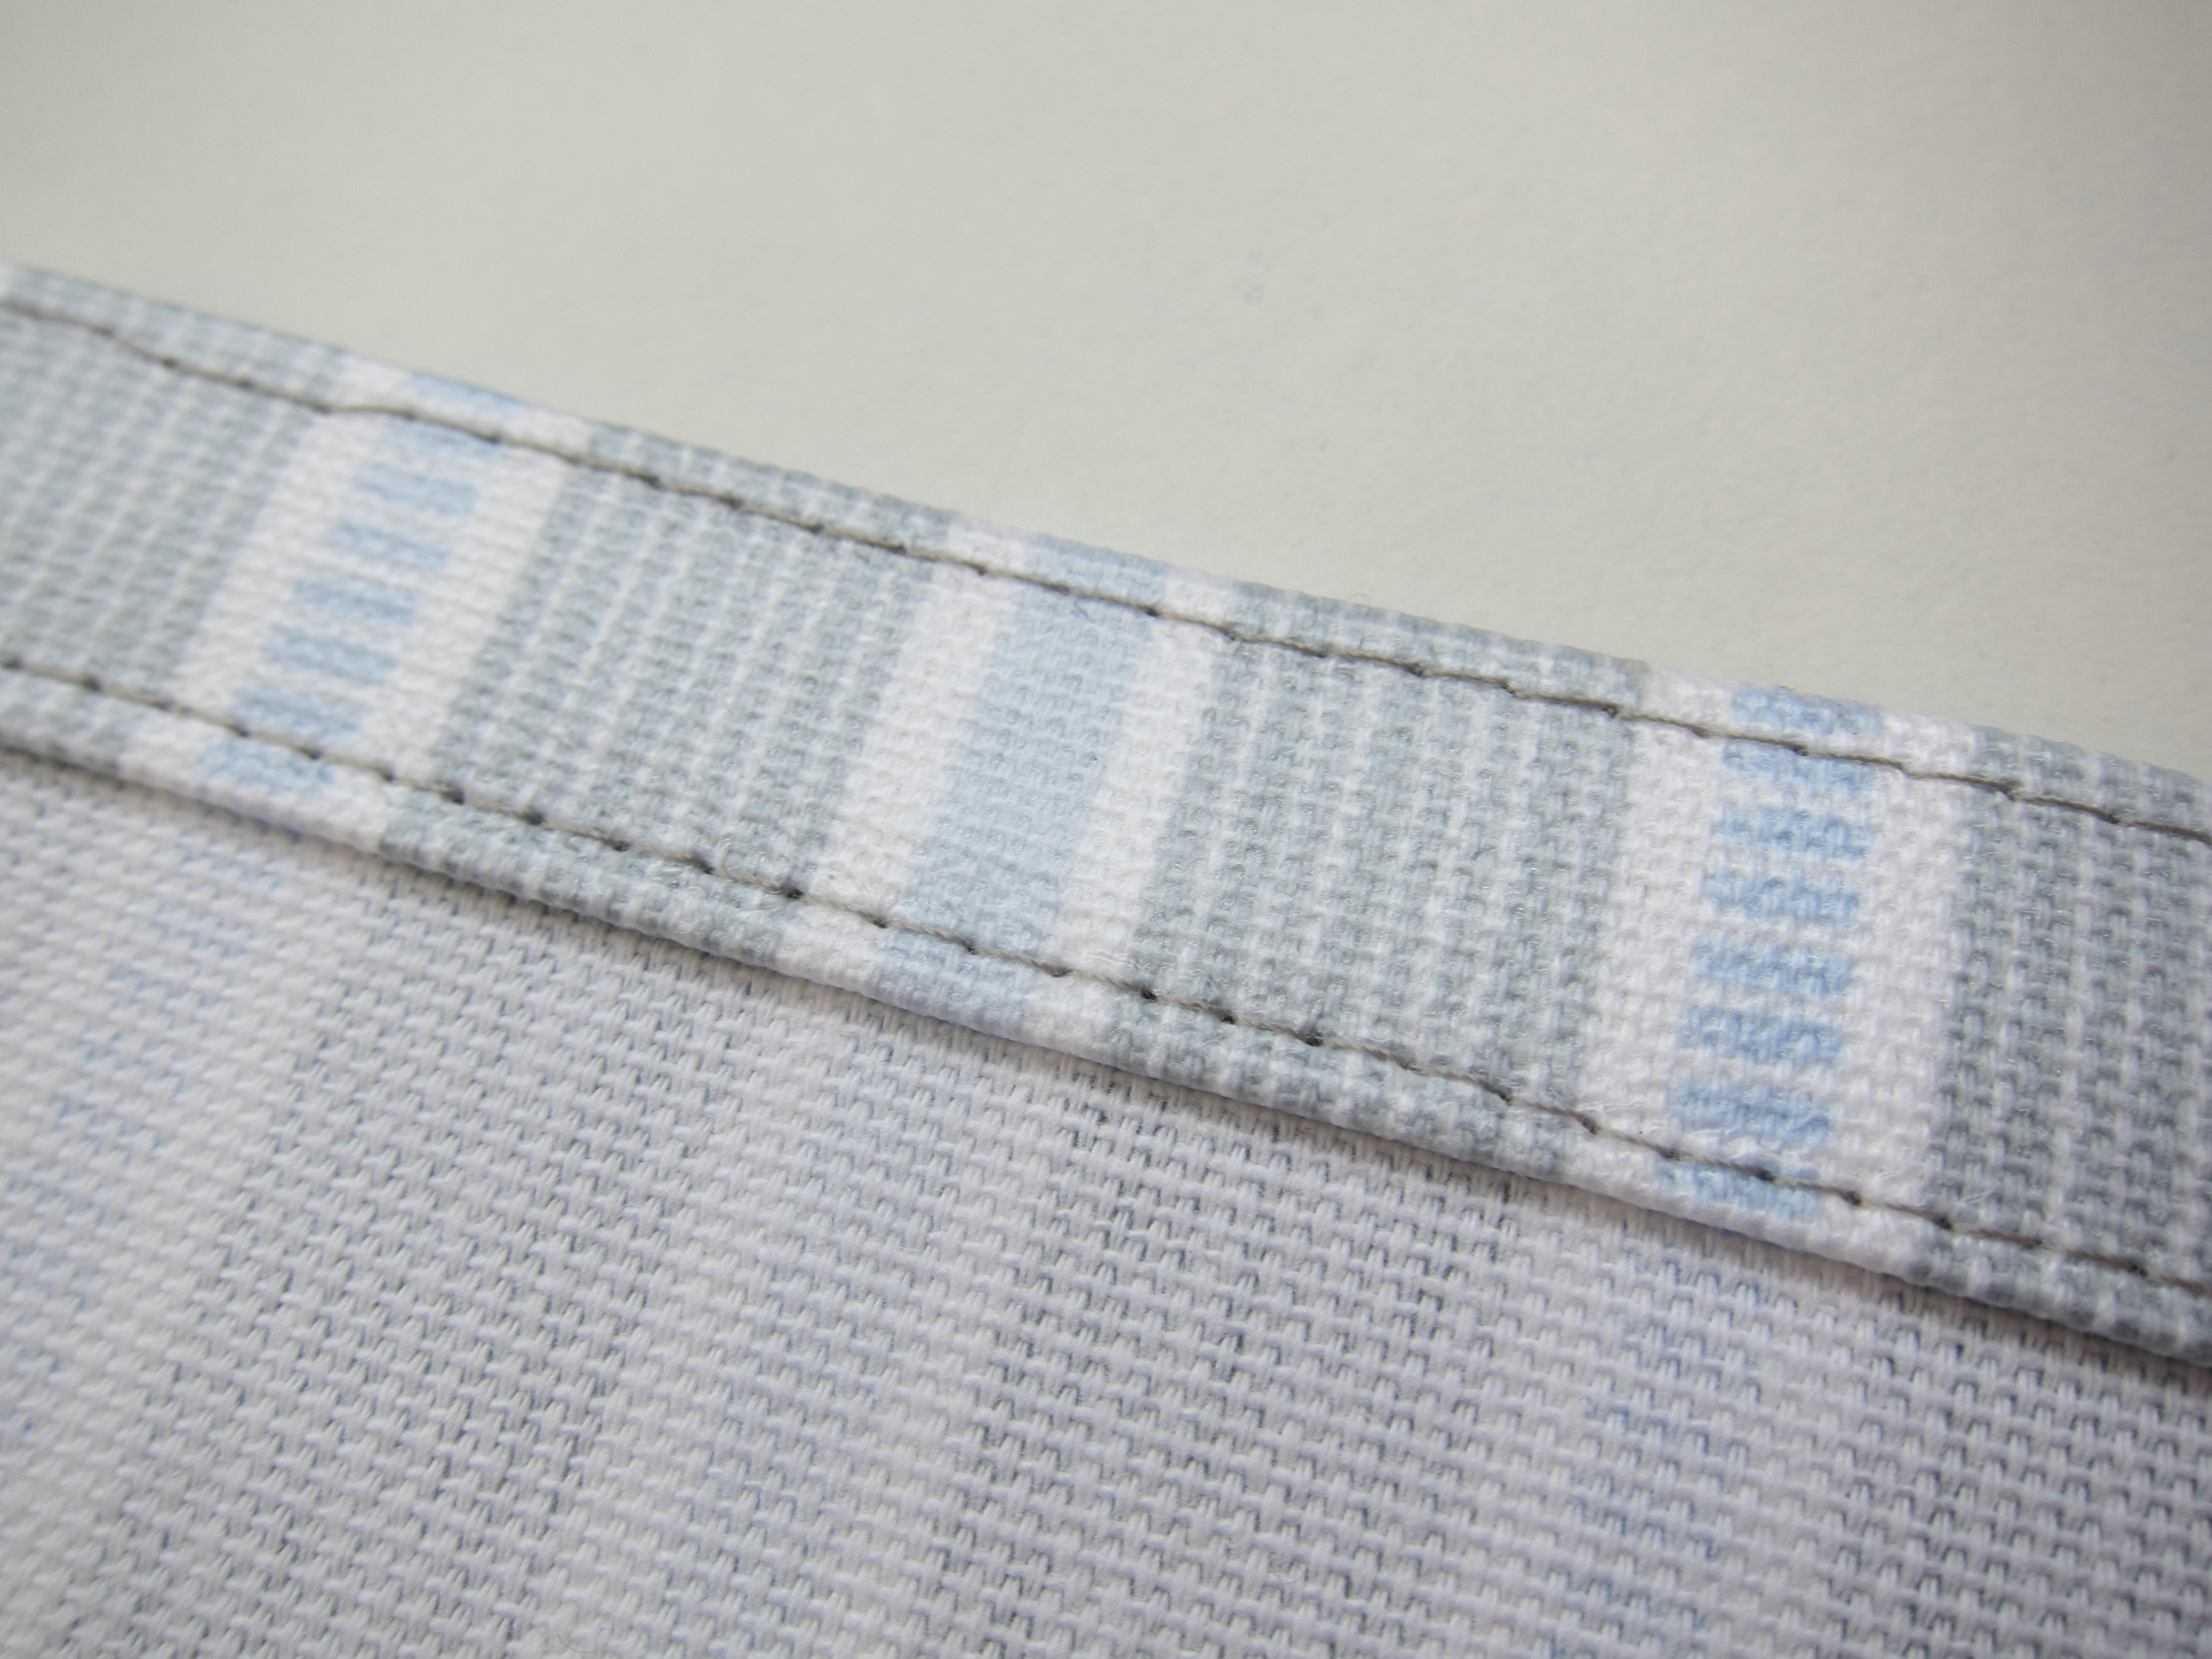
Make a line of stitching around the top edge of the laundry bag and on either side of the drawstring channel, as shown in the photo. (Pic 8)

Take one piece of drawstring and thread it all round the top of the bag. A Clover Easy Loop Turner makes quick work of this, but a large safety pin will also work. Knot the 2 ends of the drawstring together. (Pic 9)

Knotting the ends of the drawstring together
Next take the other piece of drawstring and thread it through the channel so that the knotted ends are at the other side of the laundry bag. Knot them together to finish. (Pic 10)

The final step is to stitch up the turning hole in the lining with ladder stitch.

Wipeable Waterproof Kneeler / cushion
This month Ali from Very Berry Handmade has come up with a real life saver for any keen gardener – a garden kneeler in our Ochre and Ocre wipeable eco friendly PU fabric.

The finished garden kneeler in wipeable PU from Ochre and Ocre

Our PU is easy to sew – not too thick, so you can stitch it with a domestic machine and Ali has given some great tips below on how to do this as easily as possible. It’s also simple to look after just give it a wipe clean.
Some tips for working with laminated cotton
● Use 100% polyester thread and a 90/14 needle in your sewing machine.
● Use a long stitch length if possible – I used 3mm setting for the kneeler.
● A standard sewing machine foot will be just about ok for this project (because of the small amount of sewing involved), but when you are stitching on the right side of the laminate, it will not travel well through the machine and you will get uneven stitches. Use a walking foot, roller foot or Teflon foot if you have one. Another option is to use a piece of baking parchment between the fabric and your presser foot whilst stitching, and tear it away when you are finished.
● Take care when pressing laminate. Work on the wrong side (or use a pressing cloth or baking parchment on the right side of the fabric) and use the coolest setting on your iron.
● Any holes you make in the laminate will be there forever (no pressure!). It is best to use quilting clips, bulldog clips or even paper clips to hold pieces in place. If you do decide to use pins, take care to pin within the seam allowance.
Pattern notes
The seam allowance is 1cm throughout.
The finished size of the cushion is 30cm by 54cm.
All lines of stitching should be completed with a little reverse stitching to secure ends.
You will need
● 2 pieces of laminated cotton measuring 36cm by 60 cm from the Ochre & Ocre range. I used Madelaine in sage and Ledbury in blue & grey.
● 1 piece of pre-cut foam measuring 4cm by 30cm by 50cm.
● 6 coordinating Kam snaps (or other snap fastener suitable for heavyweight fabrics) plus fastening tool, or 28cm of 16mm hook and loop tape (e.g. Velcro)
● 50cm of 38mm webbing (I used candy striped cotton webbing)
Step 1
Take one of the pieces of laminate and fold in one short edge a scant 2cm, then fold 2cm again.

Use clips to hold the fold, then stitch closed. Make another line of stitching close to the folded edge.
Repeat with the other piece of laminate.**
Step 2
Measure and mark 5cm from either side of the folded edge of one of the pieces of laminate, then make 4 more marks, equally spaced, between those 2 points (about every 5cm). Install a Kam snap stud and cap at each of the marks. Repeat with the other piece of laminate, installing a Kam snap socket and cap at each mark.

**If you are using hook and loop tape instead of the Kam snaps, omit the second line of stitching and the whole of Step 2. After stitching the folds closed, stitch one section of the hook and loop tape on one fold, and the other piece of the corresponding fold on the other piece of laminate.
Step 3
Mark 9cm from either side on the remaining short side of one of the pieces of laminate. Place the outer edges of either end of the webbing on these marks, aligning the raw edge of the webbing with the raw edge of the laminate, making sure that the webbing isn’t twisted, and secure temporarily with clips.


Place the other piece of laminate right sides together with the first, sandwiching the webbing between the 2 pieces, and secure with more clips.
Step 4
Stitch the short edge of the cushion closed, securing the webbing as you do so.

Then stitch the 2 long side seams of the cushion closed.
Step 5
Turn the cushion right side out. Press on the right side with a very cool iron, protecting your iron and ironing board (and the laminate!) with a pressing cloth or piece of baking parchment. Top stitch the edge with the webbing attached, close to the seam, and then make another line of top-stitching parallel to it, about 1.5cm away.

Ochre and Ocre PU wipeable fabric garden kneeler
Step 6
Finally, insert the foam pad and fasten the snaps/hook and loop, to finish.


Confetti – it’s more than you think!


We’ve teamed up with the lovely peeps from Shropshire Petal’s this month for our May competition giveaway. So we thought we’d ask them to share some of their best ideas for using their beautiful petals.
Confetti – it’s more than you think!
Getting married is one of the most exciting days of your life. Whether you’re planning a big venue wedding or a small intimate affair, the throwing of confetti symbolises the union of marriage. However, confetti isn’t just for weddings, there is so much more you can do with it!
When someone mentions confetti to you, what do you think? Do you imagine horseshoe and heart shaped paper or synthetic coloured shapes? Shropshire Petals grow and produce 100% natural petal confetti on their Shropshire farm and they would like to share their top 5 alternative ways for using confetti.
- Table decorations – confetti is great when used to decorate tables. If you’re having an afternoon tea party, birthday celebration or any other special occasion, sprinkle some confetti onto white table clothes to give your table some colour and texture.

Confetti as table decorations
- Jazz up cakes – use large and small petals like delphiniums and roses to turn plain cakes into something spectacular. Place bold coloured rose petals on top of buttercream for a colour splash or decorate larger cakes with fresh or dried flowers and sprinkle some smaller petals around when displaying your cake. This is very simple, yet looks like a piece of artwork.

Pretty cake decorations

Confetti cake decorations
- Set the romance – treat your partner to a romantic evening in. Set out a scattering of petals around the house for them to follow to a nice hot bath with petals floating on the top. Why not make a heart shape out of petals on the bed for some added romance.

Time for romance
- Confetti filled balloons – if you are having a party or celebration, fill some balloons with confetti for a great entertainment feature. Place messages for your guests inside and ask them to pop the balloons letting confetti fall delicately with their message.

Confetti filled balloons
- Handmade gifts and treats – petals are fantastic for using to make handmade gifts such as bath bombs and candles. Here is how you make them:
Bath bombs:

Ingredients for your Bath Bombs
Ingredients:
- A candle of any size (you can buy candle wax, however it is cheaper to use pre-made candles)
- Pre-waxed candle wicks with metal tab bottoms
- A container of your choice (Shropshire Petals have used an old jam jar)
- Petals of your choice (Shropshire Petals have used Highland Fling)
- A scent of your choice (optional)
Also needed:
- An old pan
- Double-sided sticky tape
- Cocktail sticks
- Thermometer
- Hairspray
Step 1: Prepare your container by cleaning it, making sure there is no dust or dirt inside.
Step 2: Attach the metal tab at the bottom of the wick to the bottom the jar using double-sided sticky tape. Don’t worry too much about getting it completely stuck down, as this can be difficult on glass. The tape is just to help hold the wick in place.
Step 3: Spray the inside of the jar around the edges and pour in some petals, spreading them around the jar. The hairspray should help the petals to stick to the sides.

Step 3
Step 4: Place the candle into the pan – making sure you remove the old wick – and heat gently until the wax has melted. Depending on how many petals you want in your candle, you can add petals to the melted wax.

Step 4
Step 5: Allow the wax to cool until it is roughly degrees C. This will allow the wax to set quicker to ensure it does not pull the wick down into the candle too much as the wax hardens. Slowly pour the melted wax into the jam jar, trying not to get any on the sides at the top of the jar. If you do, you can scrape it off.
Step 6: Add your chosen fragrance if you are choosing to have a scented candle.

Step 6
Step 7: Allow the candle to set. As it sets, it can create a dip in the middle around the wick, this is easily resolved! Once the candle is nearly set, melt some extra wax and simply top the candle up to create a flat surface.
Step 8: Your petal candle is complete. You can now decorate the jar and lid to suit your wedding theme.

Step 8

The finished fragrant candle
Quick and simple to make, these petal candles can be made for any special occasion or just for your home.
Bath bomb:
Step 1: Gather your ingredients – 2 parts sodium bicarbonate (approx 300g) to 1 part citric acid, lots of natural petal confetti (we used 1 litre of raspberry fool pink delphiniums and have plenty left) and a tiny amount of water.

Shropshire Petals Bath Bomb ingredients
You will also need a bowl, spoon and a mould of your choice. (Shropshire Petals used old Christmas baubles)
Step 2: Add all of your dry ingredients into the bowl; confetti petals, sodium bicarbonate, citric acid (2:1) and give it a good mix.
Step 3: Add in a ‘spritz’ of water and give it all a really good mixture. Add the water sparingly until the mixture starts to clump together, mixing all the while.

Bath Bomb step 3
Step 4: Your mix should be still slightly powdery but able to compact and stay together.
Tip – it is a good idea to have a bit of sodium bicarbonate and citric acid pre-mixed separately in case you add too much water, you can then add in some of the extra mix to soak it up.

Step 4
Step 5: Pack your mixture into your moulds, be firm with them!
Step 6: Press your two halves together and give them a good squeeze.

Step 6

Shropshire Petals Finished Bath Bomb
Step 7: Leave the mixture for about half an hour, they should then be dry enough to come out of the moulds.
Step 8: Leave your confetti bath bombs overnight to dry out properly.
These pretty bath bombs can make perfect handmade gifts. Wrap in pretty tissue paper or clear cellophane and place in a gift box to give to your friends and family on special occasions, or just because.

The perfect handmade gift
Tip – for an extra special touch try adding a small amount of lavender or rose oil for a delicate fragrance or some natural colouring to make coloured bath bombs.
Quick and simple to make, these petal bath bombs can be used for any special occasion; birthdays, Easter, Mothers day and Valentines Day. Shropshire Petals used a basic recipe from www.bathbomb.com. Who will you be making bath bombs for?
For more inspirational natural petal confetti ideas, please visit www.shropshirepetals.com.
Who are Shropshire Petals?
We are growers and producers of natural petal confetti. This year marks the 10-year anniversary from when we first started to grow and sell our natural petal confetti.
Our petals are lovingly grown, hand-picked and hand-packed on our farm in Shropshire so you can be sure that they are 100% natural and biodegradable. The pretty petals are perfect for throwing and ensure that you get that big confetti shot! We also grow wheat for our handmade wheat sheaves which are perfect as bouquets or table decorations.

Visit their website for more information. www.ShropshirePetals.com

Don’t forget to enter our Shropshire Petal giveaway over on the Ochre and Ocre competition page.
Eggcellent Egg cosies!
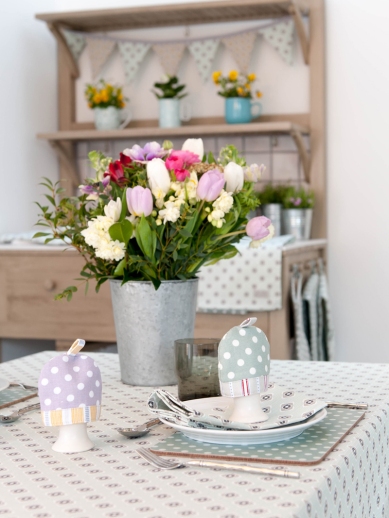
A great Easter project for you this month by the talented Ali Burdon from Very Berry Handmade. Whether you use them to keep your boiled eggs warm or to make a special Easter gift with a mini chocolate egg you can have lots of fun mixing and matching the colours and designs. We’ll hand you over to Ali now for her easy to follow step by step guide;
There’s nothing to beat a boiled egg and soldiers for a special breakfast. These egg cosies will keep your egg lovely and warm whilst you get on with buttering your toast! These Ochre & Ocre polka dot prints (beautifully named Madelaine) will add a sweet spring-like feel to your Easter table.
Pattern notes
Seams are 1cm throughout. Trim all seams to approx 5mm after stitching. You will need to download the egg cosy template before you start – remember to deselect the ‘Shrink to Fit’ box in the Print Dialogue box when printing out the template (if you have that option!).
You will need:
About 12cm by 18cm main outer fabric (the Madelaine polka dot fabric in my versions)
About 25cm by 16cm for the trim, tag and lining (I used coordinating stripes from the Ochre and Ocre organic collection).
About 22cm by 12cm fusible fleece (I use Vilene H630, but any will do for this project)
Cutting list:
From the main fabric cut:
2 pieces measuring 9cmx12cm
From the lining/trim fabric cut:
2 pieces measuring 4cmx12cm for the trim
2 pieces measuring 11cmx12cm for the lining
1 piece measuring 4cmx7cm for the tag
From the fusible fleece cut :
2 pieces measuring 11cm x 12cm
Step 1 – Make the tag
Fold the tag in half lengthways, then unfold, and fold the 2 long edges into the middle fold. (Pic 1, Pic 2)

Making the tag – fold it in half

Fold 2 long edges into middle fold
Fold down the middle again to create a narrow strip (a little bit of washable fabric glue is very useful for holding the fabric at this stage). Stitch to close the fold, then stitch the other side to match. (Pic 3)

Creating the tag – stitch down each side
Step 2 – Stitching the outer pieces
Take a piece of trim and a piece of the main fabric and pin right sides together, along matching 12cm edges. (Pic 4, Pic 5)

Main fabric and trim

Pin with right sides together
Stitch, then press the seam allowance sideways towards the trim fabric (don’t press it open).
Repeat this process for the other outer pieces, then apply fusible fleece to both completed outer sections.
Pin the template to one of the outer sections, draw round it and cut out the egg cosy shape. (Pic 6, Pic 7) Repeat with other outer section.

Draw around the template

Cut out the egg cosy shape
Top stitch the edge of the trim on both of the outer sections. (Pic 8)

Top stitch the trim
Step 3 – Completing the outer section
Fold the tag section in half and pin or glue to centre point of the curved top of the egg cosy, on the right side of one of the outer sections. (Pic 9)

Attach tag section to centre point
Place the other half of the outer on top, right sides together, and pin. Stitch round the sides and curved edge of the cosy. You will need to ease your presser foot gently over the tag.
Trim the seam, then trim excess fusible fleece out of the seam allowance. Cut small notches in the curved section to reduce bulk.
Step 3 – Make the lining section
Use the template to cut the lining pieces. (Pic 10)

Create lining pieces
Pin the 2 pieces right sides together and stitch the sides and the curved edge as before, but this time leave a 5cm gap in one of the sides. Reverse stitch at either side of the gap so that the seam doesn’t unravel when you turn the egg cosy through.
Trim the seam and cut notches in the curved section as before. (Pic 11).

Trim and notch seams
Step 4 – Complete the cosy
Turn the outer section right side out and press the seam. Keep the lining section inside out and put the outer inside it, so that right sides are together. Line up the side seams and raw edges. pin together and then baste (you can just stick with the pinning, but the next section is easier if you baste, believe me!). Stitch round the bottom edge. (Pic 12)

Stitch around the bottom edge
This is quite tricky as the egg cosy is so small – you will find it easier to put the egg cosy in the machine and stitch on the inside of the cosy, pulling the part that is closest to you back out of the way.
Trim the seam then turn the egg cosy right side out. Press thoroughly and stitch up the turning hole with a slip stitch/ladder stitch.
The final step is optional, but I like to top stitch the bottom edge of the cosy. Again this is a bit tricky – but the easiest way is to turn the cosy inside out, and stitch on the bottom part of the cosy when you have it in your sewing machine, pulling the section of the cosy which is closest to you out of the way.

The finished egg cosy

The finished egg cosy
Organic Cotton tablet case
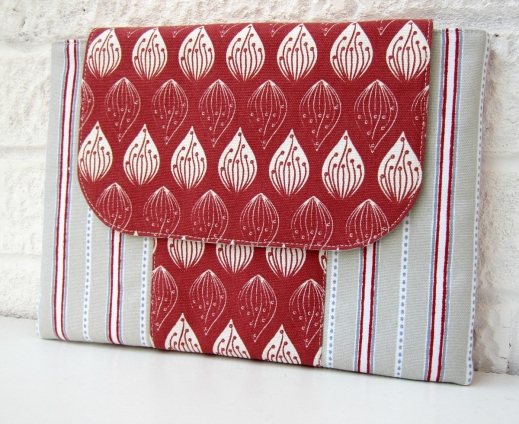
We think this months creative make by Ali from Very Berry Handmade would make an excellent gift for Mothers Day, that’s if you can bear to be parted from it. As always Ali has done a great job breaking down the process into a clear step by step tutorial. We’ll hand over to Ali now to take you through her fab make;
Even though this looks a little bit more complex than your average gadget sleeve, it is actually super-simple to sew – you can easily whip one up in an afternoon. Using Ochre & Ocre’s beautiful and hardwearing organic cottons makes total sense to make this stylish and practical project.

Pattern notes:
Tablets come in a huge variety of sizes and any cover or case needs to be a snug fit, so it is impossible to write a one-size-fits-all pattern. The measurements used here will create a clutch which is suitable for the latest iPad (the iPad Air), but not for the iPad mini or older versions of the iPad. At the end of the pattern I will describe how you can adjust the measurements for other size tablets.
The seam allowance is 1cm, unless otherwise indicated.
You will need:
¼ metre of main accent fabric (I used Isabella in red)
¼ metre of coordinating fabric (I used Malvern Stripe in grey and red)
¼ metre of medium weight fusible fleece (I use Vilene H640 – this is widely available in online fabric shops)
5cm of 2cm hook and loop tape (Velcro or an equivalent)
Cutting list:
From main accent fabric cut:
1 piece 12cm by 21cm for centre panel
1 piece 21cm by 28cm for back of the sleeve
1 piece measuring 16cm by 22cm for the front flap
From the coordinate cut:
2 pieces measuring 10cm by 21cm for the front side panels
2 pieces measuring 21cm by 28cm for the lining
1 piece measuring 16cm by 22cm for flap lining
From fusible fleece cut:
2 pieces measuring 21cm × 28cm
1 piece measuring 21cm × 28cm
Step 1 – Make the clutch outer
Put one of the front side panels right sides together with the central panel, matching one of the 21cm edges, pin then stitch together. Repeat with the other side panel on the other side of the central piece. Press the seams towards the centre panel. <Pic 1; Pic 2>


Fuse the fusible fleece to the completed clutch front.
Top stitch both sides of the centre panel, close to the two seam lines. <Pic 3>

Measure 10cm down from the middle of the top long edge of the completed clutch front. Mark this point and position the upper long edge of the hook and loop tape on this mark. Use a dab of washable glue or pin the tape, whilst you stitch it into position. <Pic 4>

Apply the 21cm by 28cm piece of fusible fleece to the back section of the clutch outer.
Put the 2 outer sections right sides together and stitch round 3 sides, with a generous seam allowance (i.e. more like 11mm than 10mm), leaving the top edge open, of course! Trim the seam to about 6mm, cut across the corners and trim out some of the bulk of the fusible fleece from the seam allowance. <Pic 5>

Turn right side out and press thoroughly, then set aside whilst you move on to the next section.
Step 2 – Make the flap section
Fuse the smaller piece of fusible fleece to the outer flap fabric.
Trim the curved corners of the pouch flap outer and lining piece, using the curved edge of a mug or glass (or something similar!) with 8-10cm diameter. <Pic 6>

Take the lining section of the pouch flap and measure 2cm up from the middle of the bottom curved edge. <Pic 7>

Mark this point and position the lower long edge of one section of the hook and loop tape on this mark. Use washable glue or pin to secure, whilst you stitch the tape into position. <Pic 8>

Put the flap front and lining sections right sides together, and stitch round, leaving the long straight edge open. <Pic 9>

Top tip: mark the curved seam line on the flap to make stitching really easy.
Trim the completed seam to about 5mm, and cut notches in the curved corners to reduce the bulk. <Pic 10>

Turn the flap right side out and press the seam to create a nice sharp edge. Top stitch around the seam line. <Pic 11>

Step 3 – Make the lining section
Put the 2 lining sections right sides together and stitch round 3 sides, this time with a scant seam allowance of 9mm rather than 10mm. Leave a turning gap of 10-12cm in one of the short sides – making sure that you reverse stitch at either end of this gap. <Pic 12>

Trim the seam to about 5mm, and cut across the corners to reduce bulk.
Step 4 – Putting the clutch together
Take the clutch outer and mark the centre of the back section with a fabric marker. Make another mark at the centre of the unstitched edge of the flap section. Pin the flap to back of the pouch, matching these 2 marks. <Pic 13>

Baste in place to keep secure for the next section.
Place the outer section, with attached flap inside the lining section with right sides together. Align the side seams, making sure that the flap stays nicely in place, and pin all round the top edge. Stitch.
Turn right side out using the turning hole that you left in the lining. Check everything is ok, the flap is nicely aligned and then turn back through and trim the upper seam. Turn right side out again and press very thoroughly.
Top stitch round the top edge of the pouch. <Pic 14>

Stitch the turning hole closed (use a slip stitch/ladder stitch) and press again to finish.


Adjusting the measurements
For other tablets, measure the height, width and depth of the gadget, and make a note of the dimensions – for the height and width, round up to the nearest half centimetre. If the tablet is 8mm or less in depth add 4cm to the height and width to get the measurements for completed front and back outer pieces and lining pieces. If the tablet is more than 8mm in depth, add 5cm.
To find the width of the flap section, subtract 6cm from longest measurement calculated above. To find the height of the flap section, subtract 5cm from the shorter measurement.
To calculate the position of the hook and loop tape stitched in Step 1 of the pattern, take the height of envelope flap measurement and subtract 6cm. Measure this distance from the top of the outer section and position the top edge of the tape at this point. The placement of the hook and loop tape on the flap section is no different from the pattern.
Example measurements for tablet measuring 14cm wide, 20cm high and 8mm deep:
Outer and lining pieces: 18cm by 24cm (adding 4cm to each measurement)
Flap pieces: 13cm (18cm-5cm) by 18cm (24cm-6cm)
Position of hook and loop on the front of the outer: 7cm from the top edge (13cm-6cm)
Quilted Country style Christmas stocking

We’ve tried to keep this months make really simple, as we know how pressured time can be this time of year, but we hope you can find a few hours to get out your sewing machine and have a play with our organic cotton fabrics.

We have mixed and matched the different designs and colours to make these more fun, but the colour combinations you can change to suit your own colour scheme.
You will need:
Ochre and Ocre Organic cotton fabric for the outer stocking, plus contrast pieces for the toes and cuffs
22cm ribbon for hanging
Tailors chalk to mark quilting grid
Coordinating lining fabric
Wadding
You can create a simple template for your stocking on newspaper or large sheet of A3 paper or email us if you would like us to send you a pattern (UK only)
Using the stocking template, cut two organic cotton stockings for the outer, cut two for the lining, and cut 2 in wadding.
Cut two toes and 2 cuffs in a contrasting fabric.

Christmas stockings in Ochre and Ocre organic cotton fabric

The cut pieces


Cut two in wadding
Using the tailors chalk draw a diagonal grid 2.5cm wide onto the main body of the stocking
Pin the stocking to the wadding, and stitch using a standard running stitch along your grid lines.
Repeat for the other side.

Stitch the cuff to the top of the stocking using a close zig zag stitch

Stitch the toe onto the stocking using a close zig zag stitch
Pin on your toes and cuffs, and stitch using a close zig zag stitch across the top of toes and the bottom of the cuffs. You can always fasten it with a simple running stitch first to make it easier. We found 2.5 wide by 0.4 gave a close line.
Now put the two outer stocking pieces right sides together, pin and stitch all the way around with a 1.5 cm seam allowance, leaving the top open. Trim and clip around the toe section.

Stitch all the way around the outside stocking leaving the top open.
Taking your lining stocking, pin the right sides together and using a 1.5cm seam allowance, stitch all away around the stocking leaving the top open and a 20 cm opening approx 10 cm down from the top.
Now turning the lining to the right side. and put it into the quilted outer stocking, so that the right sides are together. Make sure the two backs of the stockings are facing each other.
Taking a piece of ribbon, 22cm long, fold it in half and place it between the lining and quilted outer stocking at the back seam.

Stitch the lining and main stocking together

Pin the lining and outside stocking together around the top with right sides together
Pin the two stockings together around the top, making sure the hanging loop is caught. Now stitch all the way around the top 1.5cm from the top edge.

Now pull out the lining from inside the quilted stocking, and turn the quilted outer to the right side. Turn the lining piece to the right side as well.

Pulling the outside stocking out from the lining

Turning the stocking the right way out
Push the toe from the inside on the quilted stocking to ensure it forms a nicely rounded shape. Then turn the lining stocking open seams together, pin and stitch close to the edge to close the opening.

The 20 cm opening in the lining

Pinning closed the opening in the lining

Stitching closed the opening in the lining
Push your lining into the quilted stocking

Pushing the lining back into the stocking

The finished stocking
Have fun mixing and matching patterns and colourways, you can also use a contrasting stitch for your quilting
Now go and find a cosy fireplace to hang your stocking by.
An Elegant Cafetiere Cosy
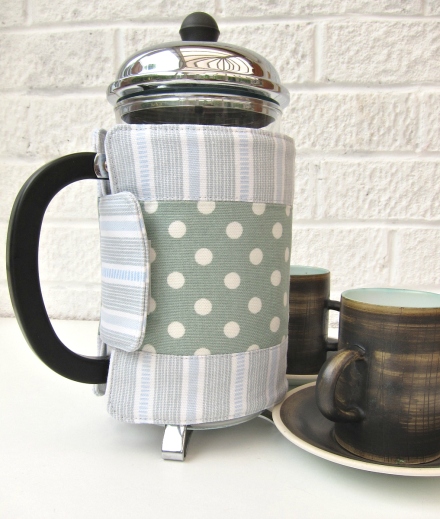
Our make this month is by Ali Burdon from Very Berry Handmade. Those of you who have been following this blog over the past few months will realise just how concise and easy to follow Ali’s makes are, and this one is no exception. An elegant cafetiere cosy, which we think would make a great gift and relatively low cost as you could make it using some of our fat quarters. We’ll hand you over to Ali from Very Berry Handmade to take you through step by step;

The finished cafetiere cosy
I used 2 beautiful coordinating fabrics from the Ochre & Ocre range to create this elegant cafetiere cosy, which would make a wonderful, quick-to-make, Christmas gift.
Project Notes
The seam allowance is 1cm throughout.
The project requires 2 layers of wadding to create the necessary insulating effect. For one of the layers I used Insul-Bright which is a wadding specially designed to provide even more insulation – it is widely available, but you can replace it with another piece of fusible fleece if you cannot get hold of it.
I used Madeleine in sage and Ledbury in blue grey from the Ochre & Ocre range.
This cosy will fit an 8 cup cafetiere with a 31cm diameter and a height of about 18cm.
Step 1
From Fabric A (the polka-dot fabric in my version) cut:
1 piece measuring 10cmx34cm
From Fabric B (the stripe in my version) cut:
2 pieces measuring 6cmx34cm
1 piece measuring 18cmx34cm
2 pieces measuring 6.5cmx8cm
From low loft fusible fleece (I used Vilene H630) cut:
1 piece measuring 18cmx34cm
2 pieces measuring 6.5cmx8cm
From Insul-Bright cut:
1 piece measuring 18cmx34cm
From 2cm Velcro cut:
1 piece measuring 4cmx2cm
Step 2
Take one of the 6cmx34cm pieces of Fabric B and place right sides together with the piece of Fabric A, aligned with one of the long edges. Pin and stitch. Repeat with the other piece of Fabric B on the other long edge of Fabric A. (Pic 1)

Pinning and stitching the layers together
Step 3
Press the seams open and then iron on the fusible fleece, following the manufacturer’s instructions. Top stitch the 2 seams, about 2mm from the seam, on the pieces of Fabric B. Use something with a curved edge (a cotton reel is good) as a template to create curved corners on the outer section. (Pic 2)

Top stitching the layers
Step 4
Measure 1.5cm from one of the short sides of outer section – position and pin one half of the piece of Velcro at this point. Stitch into place. (Pic 3)

Adding the velcro
Step 5
Create curved corners on the 18cmx34cm piece of Fabric B, in the same way that you did in Step 3, and repeat with the piece of Insul-Bright. Zigzag these 2 pieces together, all round the edge. (Pic 4)

Join the layers with a zig zag
Step 6
Iron on the fusible fleece to the 2 remaining small pieces of Fabric B. Cut 2 (only 2!) curved corners on each of these pieces.
Step 7
Take one of these pieces and measure 1.5cm from the edge with the curved corners. Position the other half of the Velcro at this point, aligned centrally, and stitch into position. (Pic 5)

Attaching the other part of the velcro
Step 8
Put this piece right side together with the matching small piece and stitch round 3 sides (leaving the long side with no curved corners unstitched). Notch the curved corners and trim seams to about 0.5cm, trimming off excess fusible fleece in the seam allowance. Turn right side out, press, then top stitch close to the edge. (Pic 6)

Turn right side out and top stitch
Step 9
Pin the completed fastening tab to the right side of the outer section at the opposite end to the other piece of Velcro, and with the Velcro facing up, as shown in the picture. (Pic 7)

Joining the tab to the main section
Step 10
Pin the outer and inner sections right sides together and stitch all round, leaving an 8-10cm turning gap in one of the long sides. Trim the seam allowance to 0.5cm, trim any excess fusible fleece in the seam allowance and notch the curved corners. Turn through and press thoroughly, turning the edges of the turning gap in to match the seam line. Top stitch all round the outer edge of the cosy to finish.
Time for a coffee!

A close up of the finished cafetiere cover
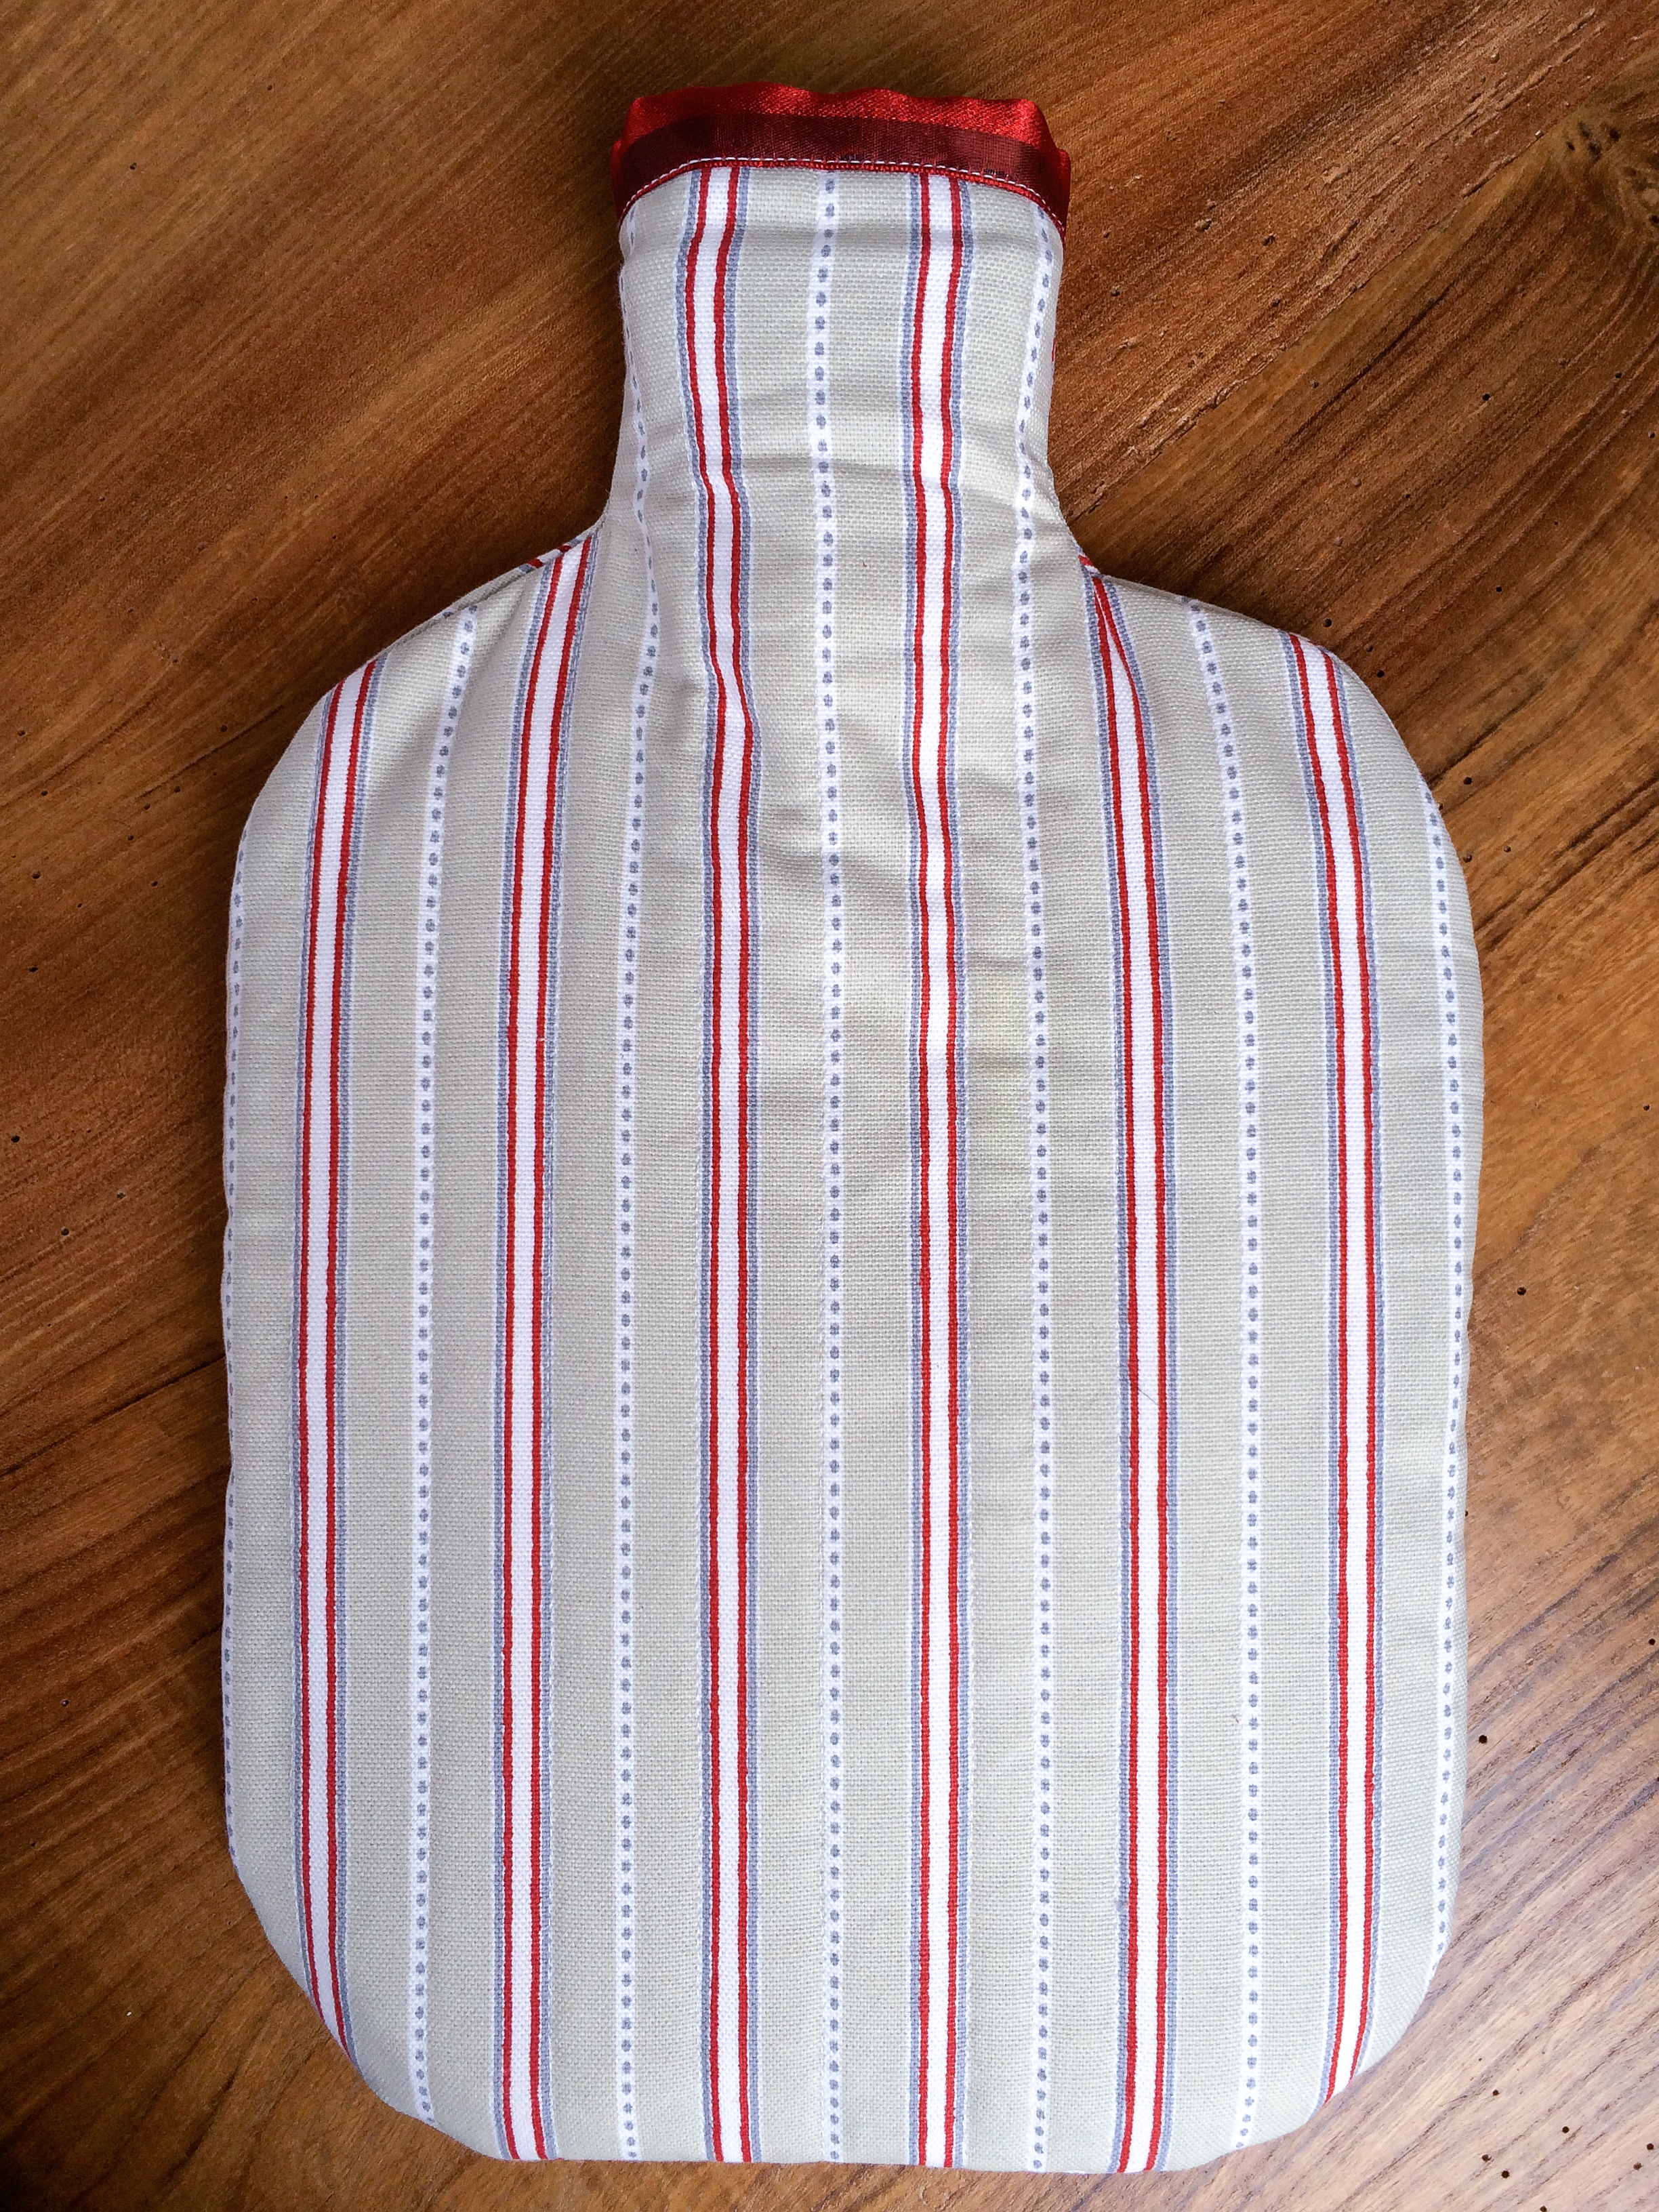
A quick quilted hot water bottle cover

Finished hot water bottle cover
One of our own makes from the house of Ochre and Ocre this month as the lovely Ali from Very Berry Handmade is facing lots of deadlines, but do not fear she will be back to inspire you next month!
With Christmas creeping up on us, we wanted to make something that you could give us a gift, but that wouldn’t take too long. We think our hottie cover would make a great gift for young or old, and we’ve done a very simple version for speed, but there are lots of ways you can pimp it up, more about that in a minute.
You will need:
A hot water bottle this forms your template
Organic cotton fabric – we used our Malvern Grey stripe for the outside and Isabella Stone for the lining organic cotton, but you can use the same fabric for both.Our organic cotton fat quarters are just the right size for his project.
Some batting or wadding
Ribbon or bias binding – you can even cut your own if you have time
Use a 1cm seam allowance through out unless specified.
The good thing about this project is you don’t need a lot of fabric, so it’s a great way to use up your odds and ends.
Firstly make your pattern – so using a sheet of A3 paper or even newspaper, place your hot water bottle onto the paper and draw around it.

Making the paper pattern
Then draw a second line 2cm away from the first line. This is your cutting line.

Adding the seam allowance
Our back has an overlapping flap so cut out the bottle shape – a quick tip here, fold the pattern in half lengthways to check that it is symmetrical. Adjust as necessary.
Then fold your pattern in half widthways. Draw a horizontal line at the halfway mark.
Draw a line 4cm above your halfway line – this will form the pattern for the bottom half of your hottie cover.
Draw another line 4cm below the halfway line. – this will be the cutting line for the top of your hottie pattern.

Paper pattern with top and bottom pieces marked out
Place the pattern on the fabric – make sure the edge runs parallel to the selvedge.
Cut out 1 whole front piece. (Or 2 if you are using the same fabric for your lining)

Draw around the pattern on the organic cotton fabric
Fold your pattern on the cutting line for the bottom and cut out the bottom of the hottie, and fold again on the top cutting line to cut out the hottie top.

Cut out the bottom piece

Cut out the top piece for the back
You will need to repeat this if you are using a different lining fabric.

All the pieces cut out in the organic cotton
Cut out 1 whole piece, and a top and bottom in your wadding.

Cut out the wadding
Sandwich your wadding between the outer and lining fabric with right sides outer.

Layer the wadding between the front and lining fabric
Start to quilt the 3 sections. The advantage of using a stripe is you already have lines to follow. Work from the inside to the outside edge on each section. We did a random pattern of stripes, the joy of this is you can decide how much you quilt.

Quilting the pieces

The quilted piece on the reverse
Once all the pieces are quilted you then need to finish the opening edges.
We used a red ribbon to bring out the red in the Malvern stripe. You can also make your own binding or use bias binding.
Start from the lining side and stitch the ribbon across the top. Approx 0.5cm from the edge.

Attaching the ribbon
Turn the ribbon over and stitch it across the top of the hottie on the front side.

Stitching the ribbon on the right side
(Again speed was of the essence for us – the alternative is to stitch it on the front side first and then handstitch it on the reverse).
Do the same on both back pieces and across the top opening.

Attaching the ribbon to the neck opening

Stitching the ribbon on the neck opening
If you want to add any applique or decoration to your cover you need to do it now before you join the front and back together.
Position the lower back piece onto the front piece right sides together with the bottom edge aligning.
Now place the top piece onto the front piece – it will overlap the bottom piece in the middle.

Laying the front and back pieces together
Pin in place so the back pieces are the same size as the front.
Stitch all the way around leaving the top opening open for easy filling.
We then trimmed the seams, used a zig zag to reinforce the edges and neaten them then turned the cover the right way out.
Pop in your hottie – boil a kettle and snuggle up with a cup of hot chocolate.
Turn the hottie the right side out


Finished hot water bottle cover
Fussy Cut Patchwork Cushion
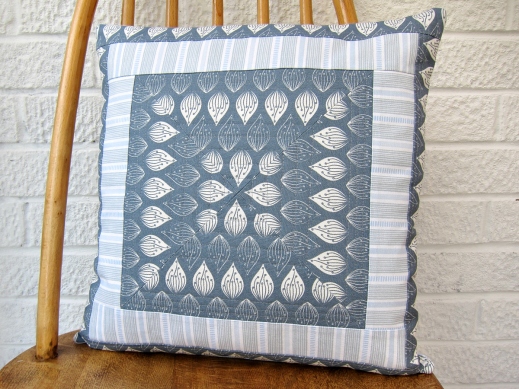

The finished cushion in our organic cotton Isabella Blue and Ledbury Blue Grey.
Fussy Cut Patchwork cushion by Ali from Very Berry Handmade
We are very lucky to have Ali on board putting together these fab tutorials for us, and really showcasing our fabrics at their best. This month she takes you through the process to make a cut patchwork cushion – a great weekend project.
We would love to see your version so pop over to our Facebook page and share your cushions with us;
Clever placement of these gorgeous Ochre & Ocre organic cotton fabrics brings another dimension to their design!
Project Notes
- Quilters use the term ‘fussy cut’ to refer to cutting out certain sections of fabric to create an effect or draw out a particular part of a pattern. Here I have carefully cut 4 triangles so that from similar sections of the print, and then stitched them together to create a new pattern from the existing designs.
- If you don’t want to do the fussy cut section as the centre panel of the cushion then you can just cut a 24cm square of Ochre & Ocre organic cotton fabric and then follow the pattern from Step 3.
- You will need two coordinating fabrics from the Ochre & Ocre organic cotton range – I used Isabella in blue for the fussy cut sections and the binding on the back (Fabric A) and Ledbury in blue and grey for the contrast fabric and the back section. (Fabric B).
- You will also need about 0.5m of low loft fusible fleece (I used Vilene H630), about 0.5m lining fabric (thin plain cotton or muslin is ideal) and an 18 inch/45cm cushion pad.
- The seam allowance is 1cm, unless otherwise noted.
Step 1
From Fabric A:
- Cut 4 right-angled triangles (it’s quickest to use a card or paper template), all with the longest edge measuring 29cm. Fussy cut these triangles so that the apex of the triangle is positioned at a similar point on the print each time. (Pic 1)

Cutting out the triangles
- Cut 2 strips measuring 6cm x 34cm and 3 strips measuring 6cm x 42cm – again make sure that these strips are cut from similar sections of the print on the fabric.
From Fabric B:
- Cut 2 strips measuring 6cm x 26cm and 2 strips measuring 6cm x 34cm.
- Cut 1 piece measuring 42cm x 24cm and 1 piece measuring 42cm x 34cm.
From the lining fabric:
- Cut 1 piece measuring 42cm x 42cm, 1 piece measuring 42cm x 24cm and 1 piece measuring 42cm x 34cm.
From the low loft fusible fleece:
- Cut 1 piece measuring 42cm x 42cm, 1 piece measuring 42cm x 24cm and 1 piece measuring 42cm x 34cm.
Step 2
Pin, then stitch, the first 2 triangles together. (Pic 2) Repeat for the other 2 triangles and then stitch the 2 halves together to create a square with 26cm sides. (Pic 3) Trim off any excess fabric.

Pinning and stitching the triangles together

Stitch the triangles together to create a square
Step 3
Take the 2 strips of Fabric B measuring 6cm x 26cm and, right sides together, pin, then stitch to opposite sides of the square. Fold these pieces right side up and press. Take the strips measuring 6cm by 34cm and stitch to the other 2 sides of the square. Press again. (Pic 4)

Attaching the strips to the square
Step 4
Take the 2 strips of Fabric A measuring 6cm x 34cm and sew to either side of the square, as before. Repeat with 2 of the strips measuring 6cm x 42cm. You should now have a square of about 42cm. (Pic 5)

Attaching the outer strips
Step 5
Apply the fusible fleece to the completed front cushion panel, following manufacturer’s instructions. Pin the lining fabric and outer section together, with the wrong side of the lining towards the fusible fleece. Quilt the cushion top however you like. I used concentric squares to emphasise the pattern. Trim the cushion top to measure 42cm square. (Pic 8)

Quilting the top
Step 6
Apply the other 2 pieces of fusible fleece to the 2 remaining pieces of fabric B. Fold the last strip of Fabric A in half lengthways to create a long thin piece of binding.
Step 7
Put the 42cm x 34cm piece of Fabric B and the matching lining piece wrong sides together. Place the binding fabric with raw edges aligned with one of the 42cm edges. Stitch with a scant 1cm seam (Pic 6 and Pic 7). Press the binding and fold it round to the lining side and slip stitch into place. You can top stitch the binding if you like.


Pin the 42cm x 24cm piece of Fabric B right sides together with the matching piece of lining fabric. Stitch down one of the 42cm edges. Turn right side out, press and then top stitch the seam.
Picture 9 shows the 2 completed back pieces.

The two completed back pieces
Step 8
Put the cushion top, right side up, on your work surface and place the larger back piece, right side down, on top, on the right hand side. (Pic 10)

Joining front to back
Put the other back piece, again right side down, on top. Pin then stitch all round the edge of the cushion. After stitching, trim the seams then finish them with a zig-zag or overlock stitch (to prevent fraying). Reinforce the section where the 2 back pieces overlap with a bit of extra zig-zag stitching inside the seam allowance.
Step 9
Turn the cushion cover right side out and press thoroughly. Insert the cushion pad and admire your handiwork!

The beautiful finished cushion

The back of the finished cushion.
The finished cushion in our organic cotton Isabella Blue and Ledbury Blue Grey.
Ochre and Ocre Homewares


Recent Comments